Activity #2: Add photos and video
Welcome to Activity #2! During this activity, you will be completing part of the Goldy Gopher basic page - final version using information from the Goldy Gopher basic page - before version and the Documents and Files for Training.
Add photos
Images are added to Drupal when you first upload them for use on a page. After you upload an image, it is stored in your media library and can be used on any other page of your website. You can use the "Upload Images to Image Fields" module on canvas to guide this process.
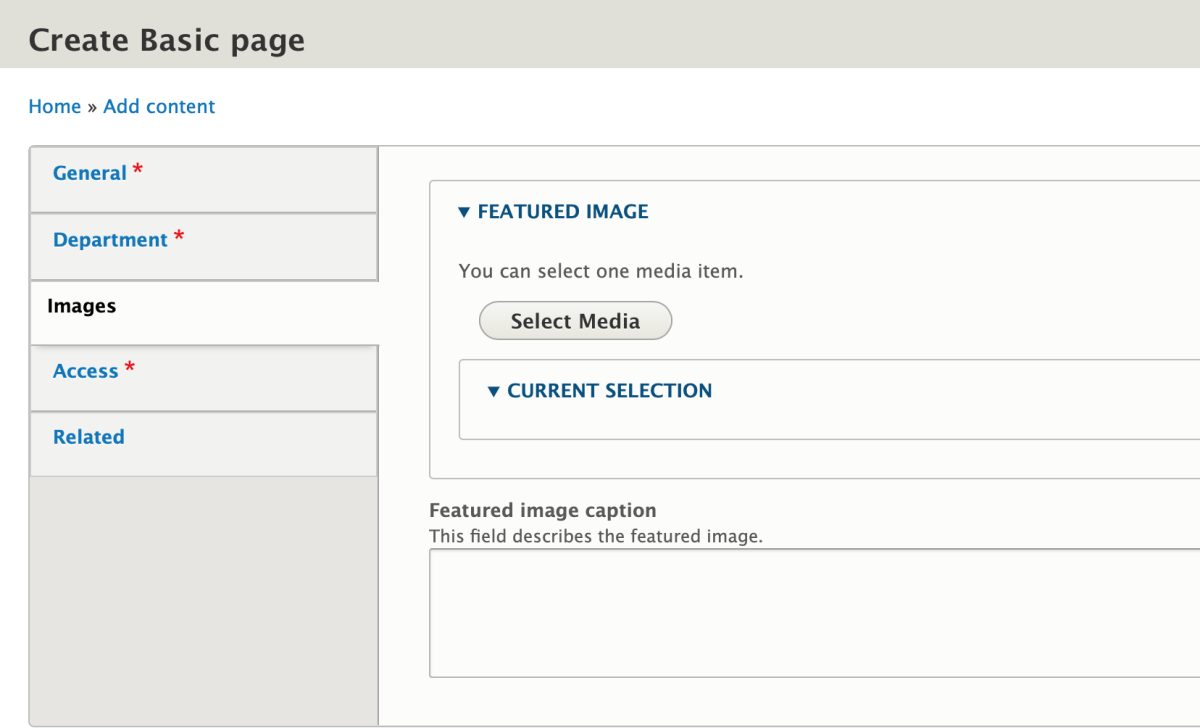
Add a featured image
This image will appear in the upper right corner of your page, above the related content sidebar.
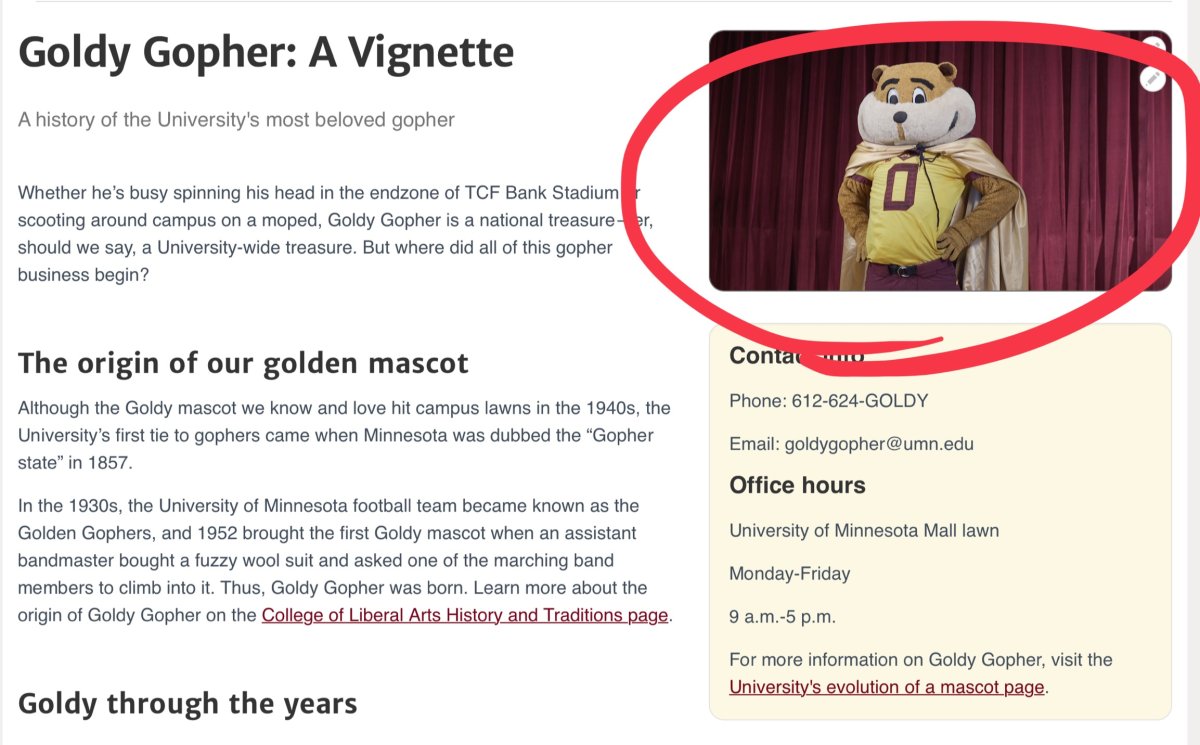
- Download the Goldy_Featured.png image from the Documents and Files for Training.
- Navigate to the editing menu on your page.
- Click on the "Images" tab.
- Click the drop-down menu and "Select Media."
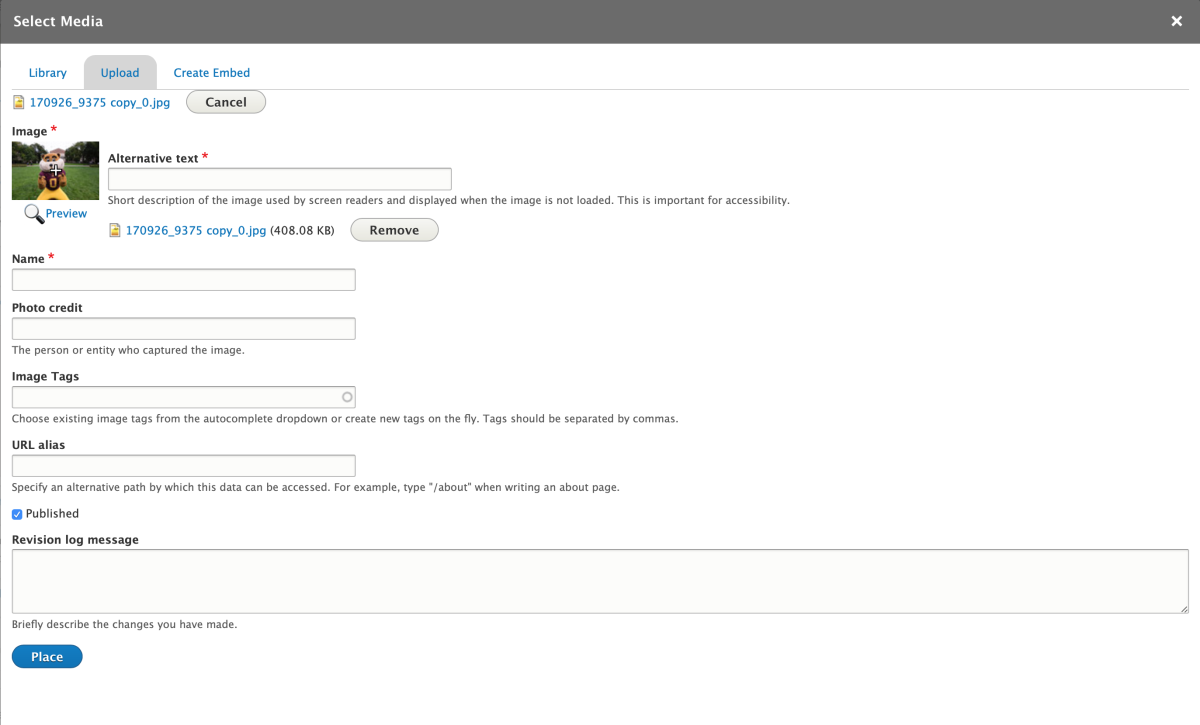
- When the pop-up appears, click the "Upload" tab to upload the Goldy_Featured.png image from the downloads folder on your computer.
- In the Alt Text field, add the following description: Goldy Gopher poses with a golden cape. (Note: The Alt Text field typically describes what is happening in the photo)
- In the Name field, add the following text: Goldy Gopher featured image.
- Click Place.
- Click Save at the bottom of your editing page.
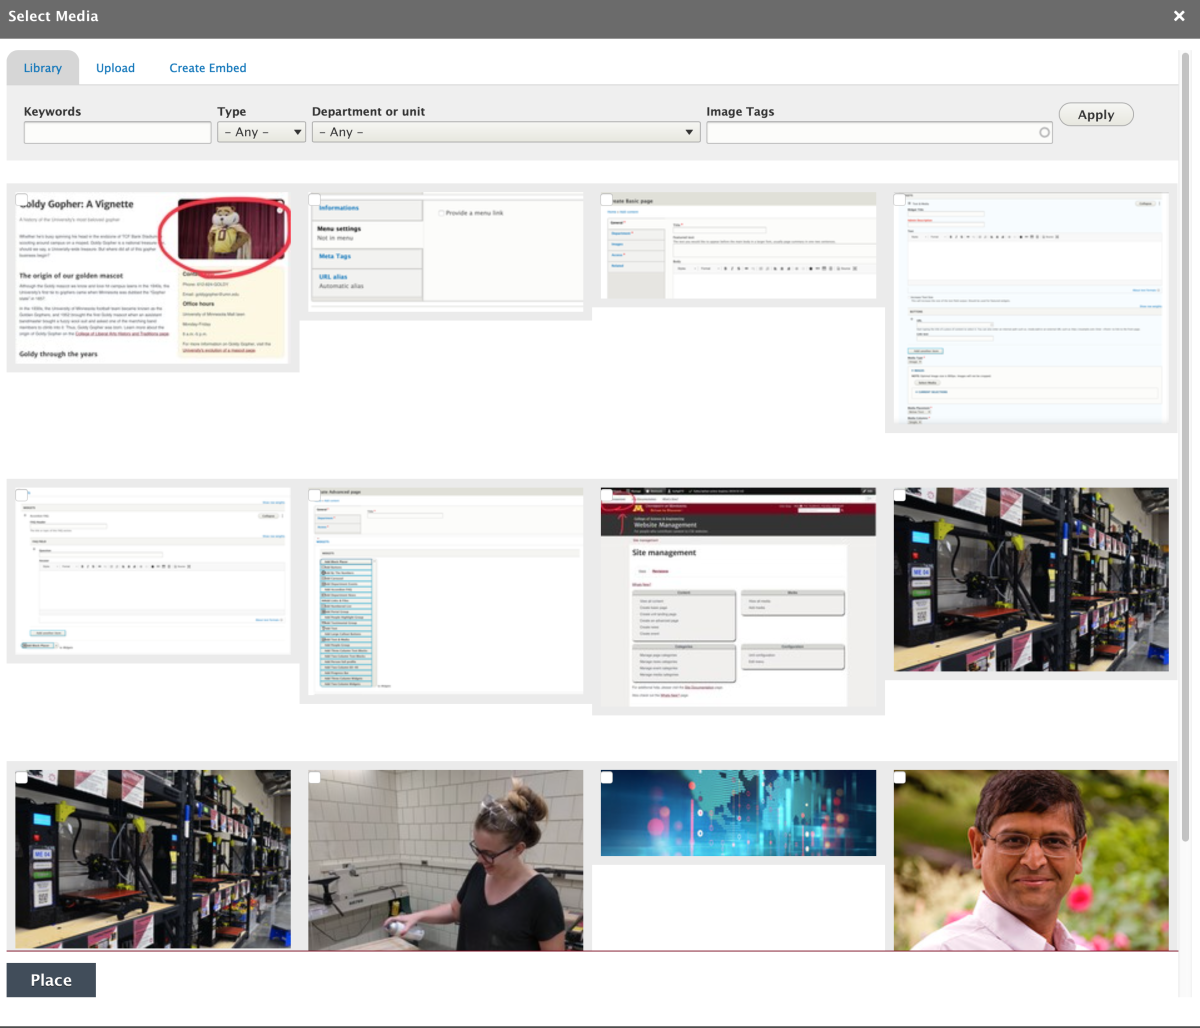
Note: If adding an image that already exists in your media library, simply choose the image from the pop-up window instead of uploading.
Add images within the body text
- Download the Goldy1954.jpg, Goldy1977.jpg, Goldy1990.jpg, and Goldy2019.jpg images from the Documents and Files for Training.
- Navigate to the editing menu on your page.
- Place your cursor after the "1954" heading and hit the return key.
- Click the "Media Browser" button on the toolbar (the star icon).
- Follow the same process outlined above to upload and name Goldy1954.jpg.
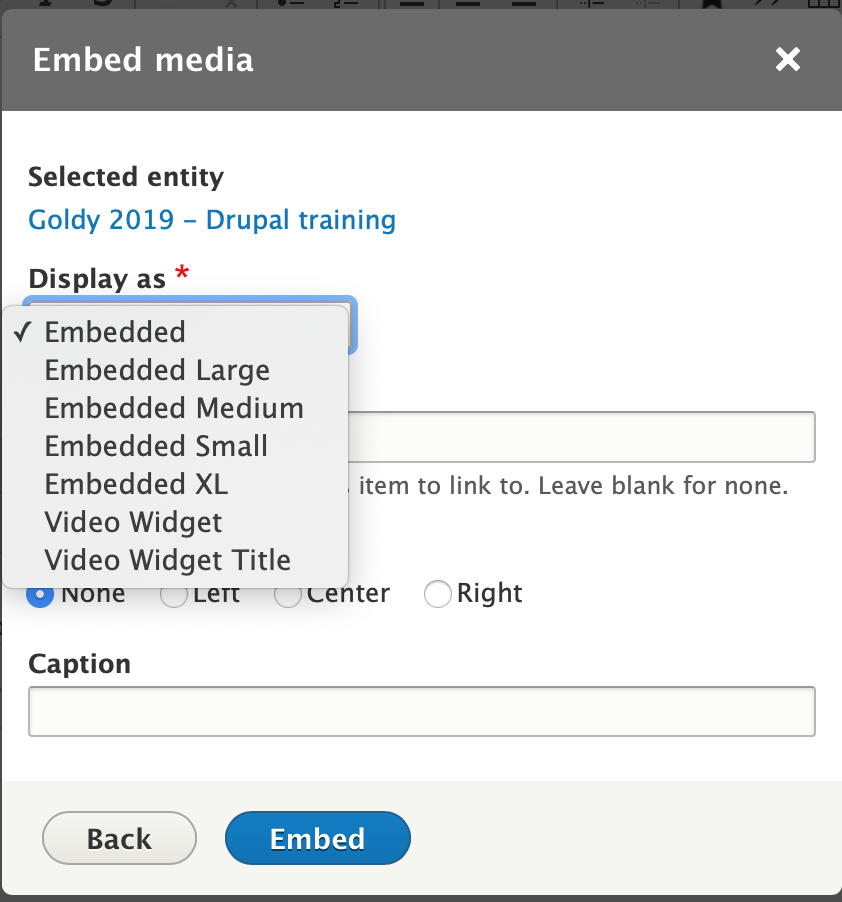
- When the pop-up window appears, select "Embedded Small" from the "Display as:" drop-down menu.
- Click Embed.
- Follow this same process for the rest of the images under their corresponding heading.
- Click Save at the bottom of your editing page.
Embed a YouTube video
For this process, you will be embedding this Goldy Gopher "Make a Wish!" video from the University's YouTube page.
- Navigate to the editing menu on your page.
- Highlight and delete the https://www.youtube.com/watch?v=INU8E5bGihc text.
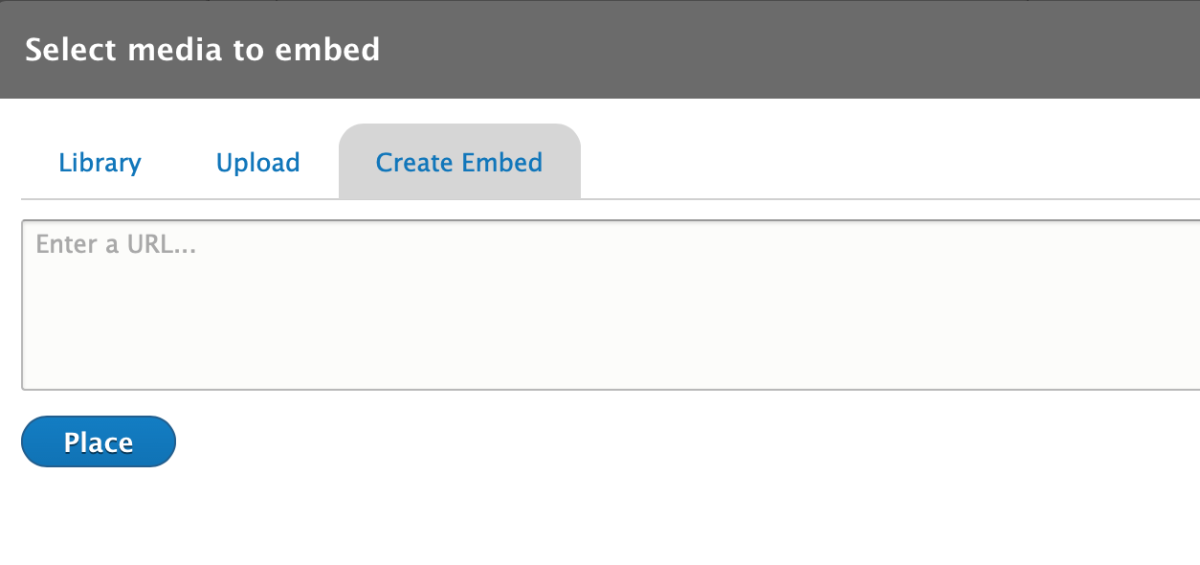
- Click on the "Media Browser" button on the toolbar (the star icon).
- Click the "Create Embed" tab.
- Copy and paste the URL from the Goldy Gopher "Make a Wish!" video into the URL field.
- In the Name field, enter this text: Make a Wish!
- Select your department or unit.
- Click Place, then Embed.
- Click Save at the bottom of your editing page.
Congratulations! You've completed Activity #2. Learn how to add related content and links in Activity #3.