Add a Network Printer from a CSE Print Server
Installing a printer on a PC
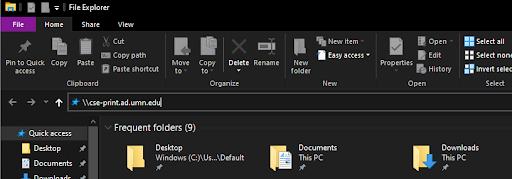
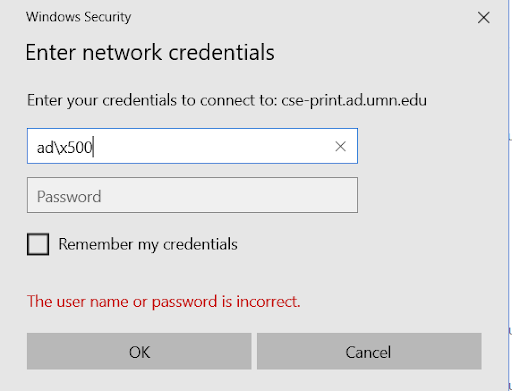
- Open a File Explorer Window and enter \\cse-print.ad.umn.edu in the navigation bar. If you are prompted for credentials, use “ad\your-internetID” (without quotes) as the username and your normal password.
- Enter network credentials.
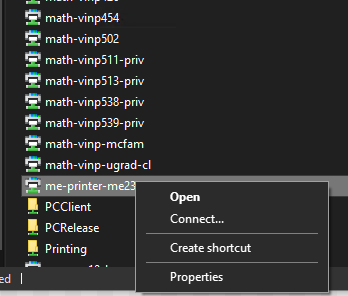
- Right-click on the printer you would like to add and press Connect...
- The printer you selected should now appear in the print menu
Installing a printer on a Mac
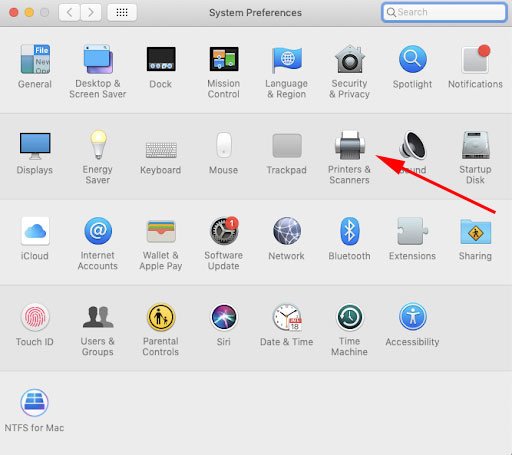
- Open up Preferences and select Printers & Scanners.
- Click the "+" sign to add a new printer
- Select the Advanced tab
- If you do not see the Advanced icon, right-click (or control + left click) on the toolbar and select Customize Toolbar
- Drag the Advanced icon from the window into the toolbar and click Done
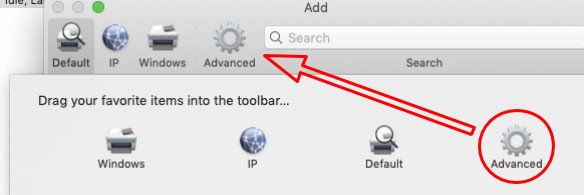
- When the Advanced menu loads (it can take a few seconds), enter the following information:
- Type: Windows Printer via spoolss
- Device: Another Device
- URL: smb://cse-print.ad.umn.edu/<the name of the printer>
- Name: a friendly name you want to use for this printer. This is how it will appear in application menus
- Location: You don’t have to fill this out, but it can be useful for remembering where a printer is located
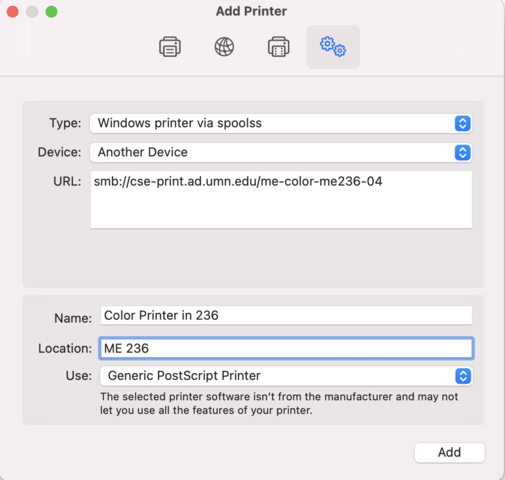
- Click Add
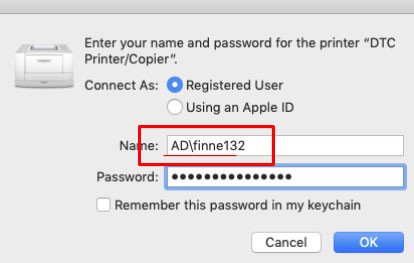
- Whenever you print, you will need to enter your Internet ID and password using "AD" before your Internet ID
- Example: AD\finne132
- The password is the same password you use to access Gmail
- You can choose to store this password in your Keychain for quicker printing
In some applications, such as Google Chrome, when you print and select your destination, you may need to select See More… under the Destination dropdown in order to see a complete list of printers you have added.
If you have any issues adding a printer or printing to a printer you have already added please contact CSE-IT Support.