Looker Studio filter instructions
Welcome to the new Looker Studio! These instructions will guide you through the process how to navigate the new filters to select your website section, YouTube channel, and Ads account, and how to troubleshoot any issues that may arise while using these filters.
How to filter through the dashboard
Three new filters now appear below the definitions and before the dashboard page-specific filters. Not all filters are used on every dashboard page, so if there are any missing, it is because those filters are not used on that dashboard page.
The default data set is for all units within CSE. Double-check the filters if you see unusual data to make sure you have the proper filter selection. After you select your unit’s filter, the metrics it controls will gray out while that page reloads. If a metric does not gray out, it is not controlled by that filter.
Learn more about how to use the specific filters below. Note: The dashboard also has a new page with a quick summary of these instructions.
Select your website section
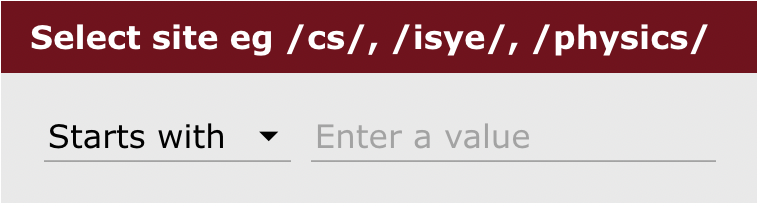
For most of the dashboard pages, you should use the default filter selection. "Starts with" will be the most common. When you enter you website use the “slash, unit abbreviation, slash” format as it appears in your website's URL. For example, /cs/, /isye/, /physics/, etc. The beginning portion, cse.umn.edu, is assumed and not used.
If you don't bookend your unit’s website with both slashes, you will get data from other sources. For example, /math without the trailing slash will also return /mathcep and stories that start with the word "math."
The default website selection will show you data for every website in the consolidated website. Watch a video demonstrating the website selection process.
Select your YouTube channel
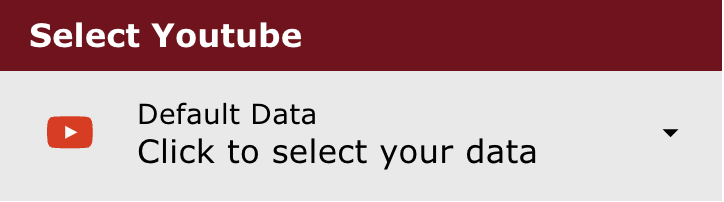
The first time you use the YouTube filter, Looker Studio will ask permission to connect to the accounts you have access to. Click Authorize if you want to see your YouTube metrics in the dashboard.
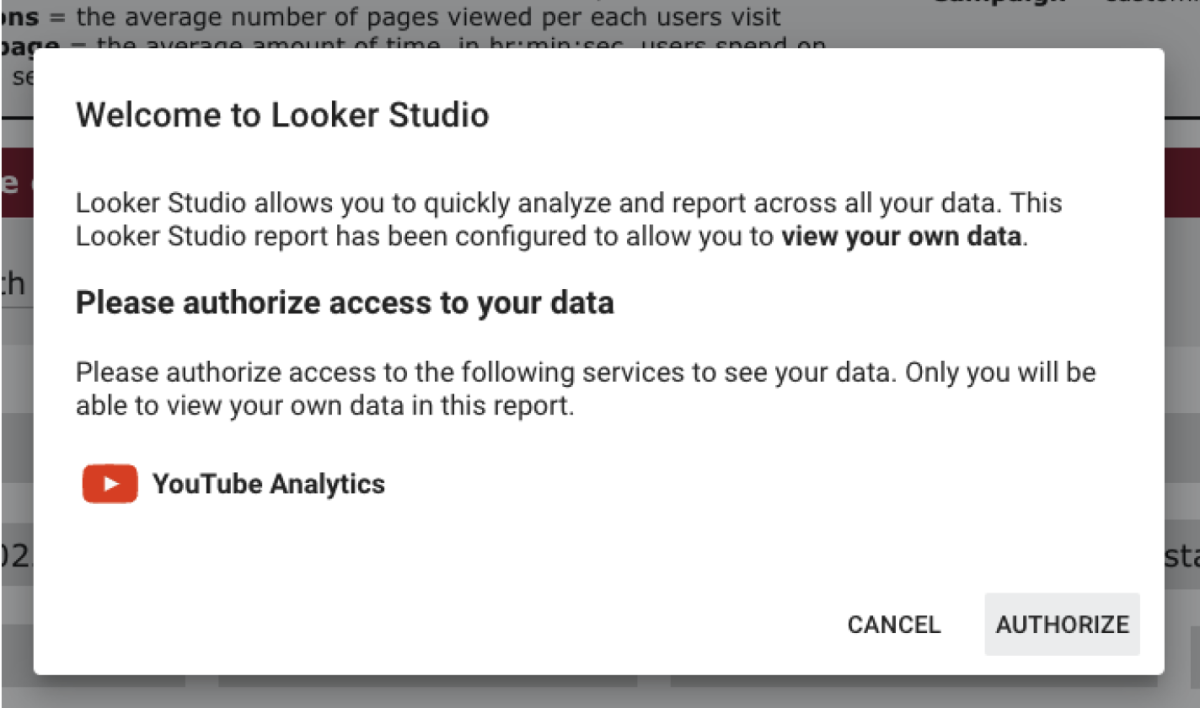
After you’ve approved Looker Studio’s access to YouTube, select your unit's channel from the drop-down list. You will see every channel for which you have admin privileges. If you don't see your unit's channel in the drop-down list after authorizing Looker Studio, it is because the filter can only access the channels for which you have admin privileges. You may need to reach out to the person with admin privileges for your unit's YouTube account and have them add you if you want to see the metrics in the dashboard.
The YouTube Default Data is the college's YouTube account.
Watch a video demonstrating the YouTube channel selection process.
Select your Ads account
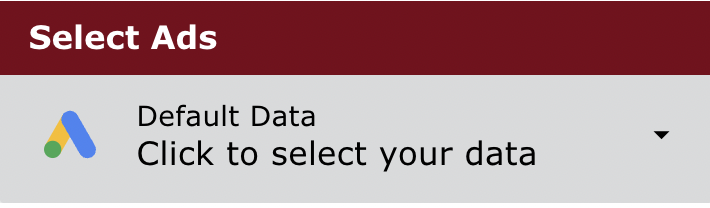
Selecting your Google Ads account is the same as choosing the YouTube process. The first time you use this filter, a pop-up will appear asking for permission to connect to the accounts you are associated with. After clicking authorize, select your unit's ad account from the drop-down list. Approve it if you want to see your metrics in the dashboard.
If you allow Looker Studio to connect to your ads account and you don’t see it, that is because the filter can only access the accounts for which you have admin privileges. You may need to reach out to the person with admin privileges for your unit's Ad’s account and have them add you if you want to see the metrics in the dashboard.
The Ads Default Data is a Google sample account .
Watch a video demonstrating the Ad Selection process.