Menu links
It's important to organize your website using a top menu, since that will make it easier for users to navigate your unit's site.
Understanding menu structure
Each site comes with its own menu space and it is not possible to add additional menu spaces. Each site has a main menu at the top of every page. The main menu is referred to as the parent of all sub-menus and can also be stand-alone menu links.
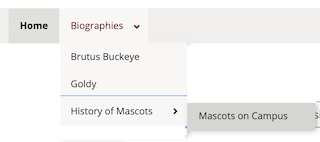
Sub-menus are created by adding pages and links to menu items in the main menu. It is also possible to create a sub-menu from a sub-menu item. Items with a sub-menu are identified by a carrot icon to the right of the menu text. The carrot icon points in the direction the sub-menu opens.
In the image below:
- Home and Biographies are in the main navigation menu
- Brutus Buckeye, Goldy, and History of Mascots are in the sub-menu of the parent Biographies
- Mascots on Campus is in the sub-menu of the parent History of Mascots

Understanding menu functionality
The Disability Resource Center highly recommends that on-click behavior be used in horizontal navigation to address usability and accessibility concerns.
When on-click is activated on a site, the horizontal navigation requires a site visitor to click on the navigation link in order to display the dropdown or mega menu.
How to add links to your menu
There are two ways to add links to your website's menu, either in the pages menu settings or through site management.
Within a page's menu settings

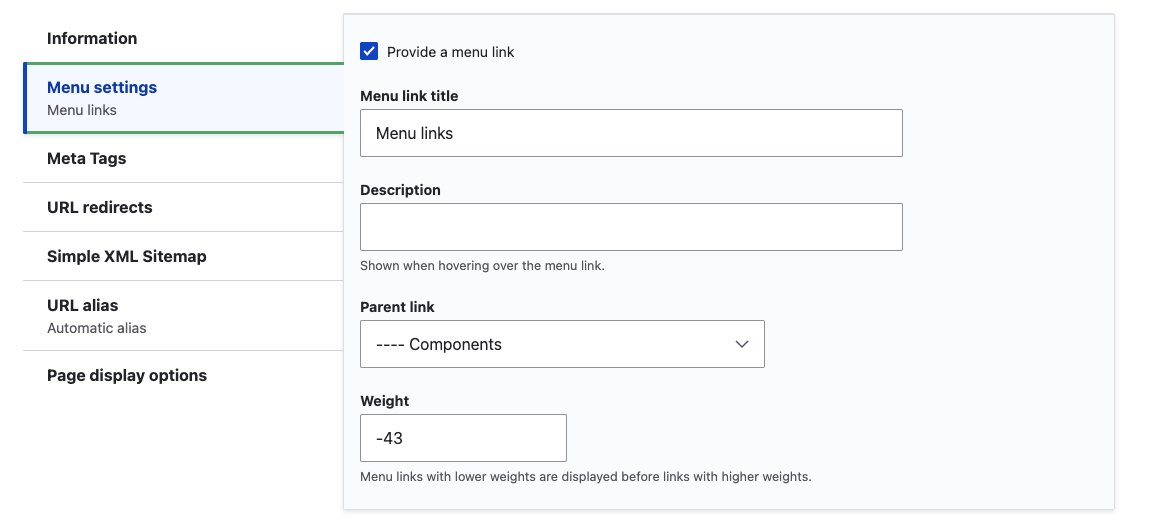
When creating or editing a basic, advanced, or unit landing page, you can use the Menu Settings tab to add the page to the menu. If you would like to add a different content type to the menu, see how to add a menu link through site management.
1. Navigate to the edit window of the page for which you want to make a menu item.
2. Scroll down to the menu settings in the bottom section.
3. Click the "Provide a menu link" box.
4. Type in a menu link title. These are the words that will appear on the top menu. The default link title is the page's title. Optional: You can type information about the page in the "Description" text box. This text appears when a visitor hovers over the menu item and should provide additional information about the page.
5. Select a "Parent item". If you want this to appear on your main menu, select your department's main menu from the drop-down. If you want to create a drop-down menu, set the parent link to be the menu item you'd like to drop down from.
- IMPORTANT: Only links to published pages will appear in the drop-down menu.
- TIP: It can be easier to add the link to your department’s main menu first. Then, reorder the menu links later.
6. Ignore "Weight".
7. Click save. Your link should now appear in the menu.
Through Site Management

1. Navigate to Site Management.
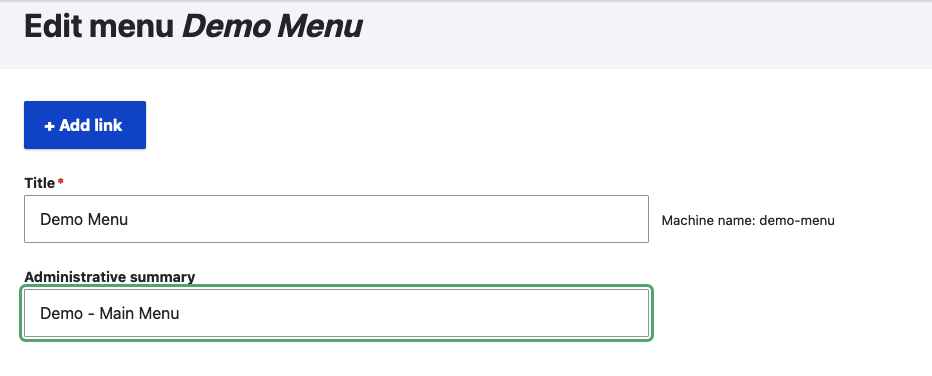
2. Click on "Edit menu" under the Menu section.
3. Find your unit and click "Edit menu" on the righthand side. After you create menu links, you can also rearrange them on this page.
4. Select the blue "+Add Link" button.

5. Type in a menu link title. These are the words that will appear on the top menu.
6. Type in the internal path for the page to which you want to link. Internal links should only include characters after "cse.umn.edu/". For example, when linking to this page you would type /hub/menu-links-and-urls.
7. Select the parent link. If you want this to appear on your main menu, select your department's main menu from the drop-down. If you want to create a drop-down menu, set the parent link to be the menu item you'd like to drop down from.
- IMPORTANT: Only links to published pages or menu links created through site management will appear in the drop-down menu.
- TIP: It can be easier to add the link to your department’s main menu first. Then, reorder the menu links later.
8. Click save. Your link should now appear in the menu.